Learn Iyengar Yoga
Explore the principles, method, and practice of Iyengar yoga through articles, videos, and personal reflections
Where to Begin
New to Iyengar Yoga?
Start with a clear understanding of what Iyengar yoga is, how it differs from other styles, and how to begin safely.
Study and Reflect
Explore articles that expand your understanding of Iyengar Yoga, highlighting the link between yoga off the mat, and on.
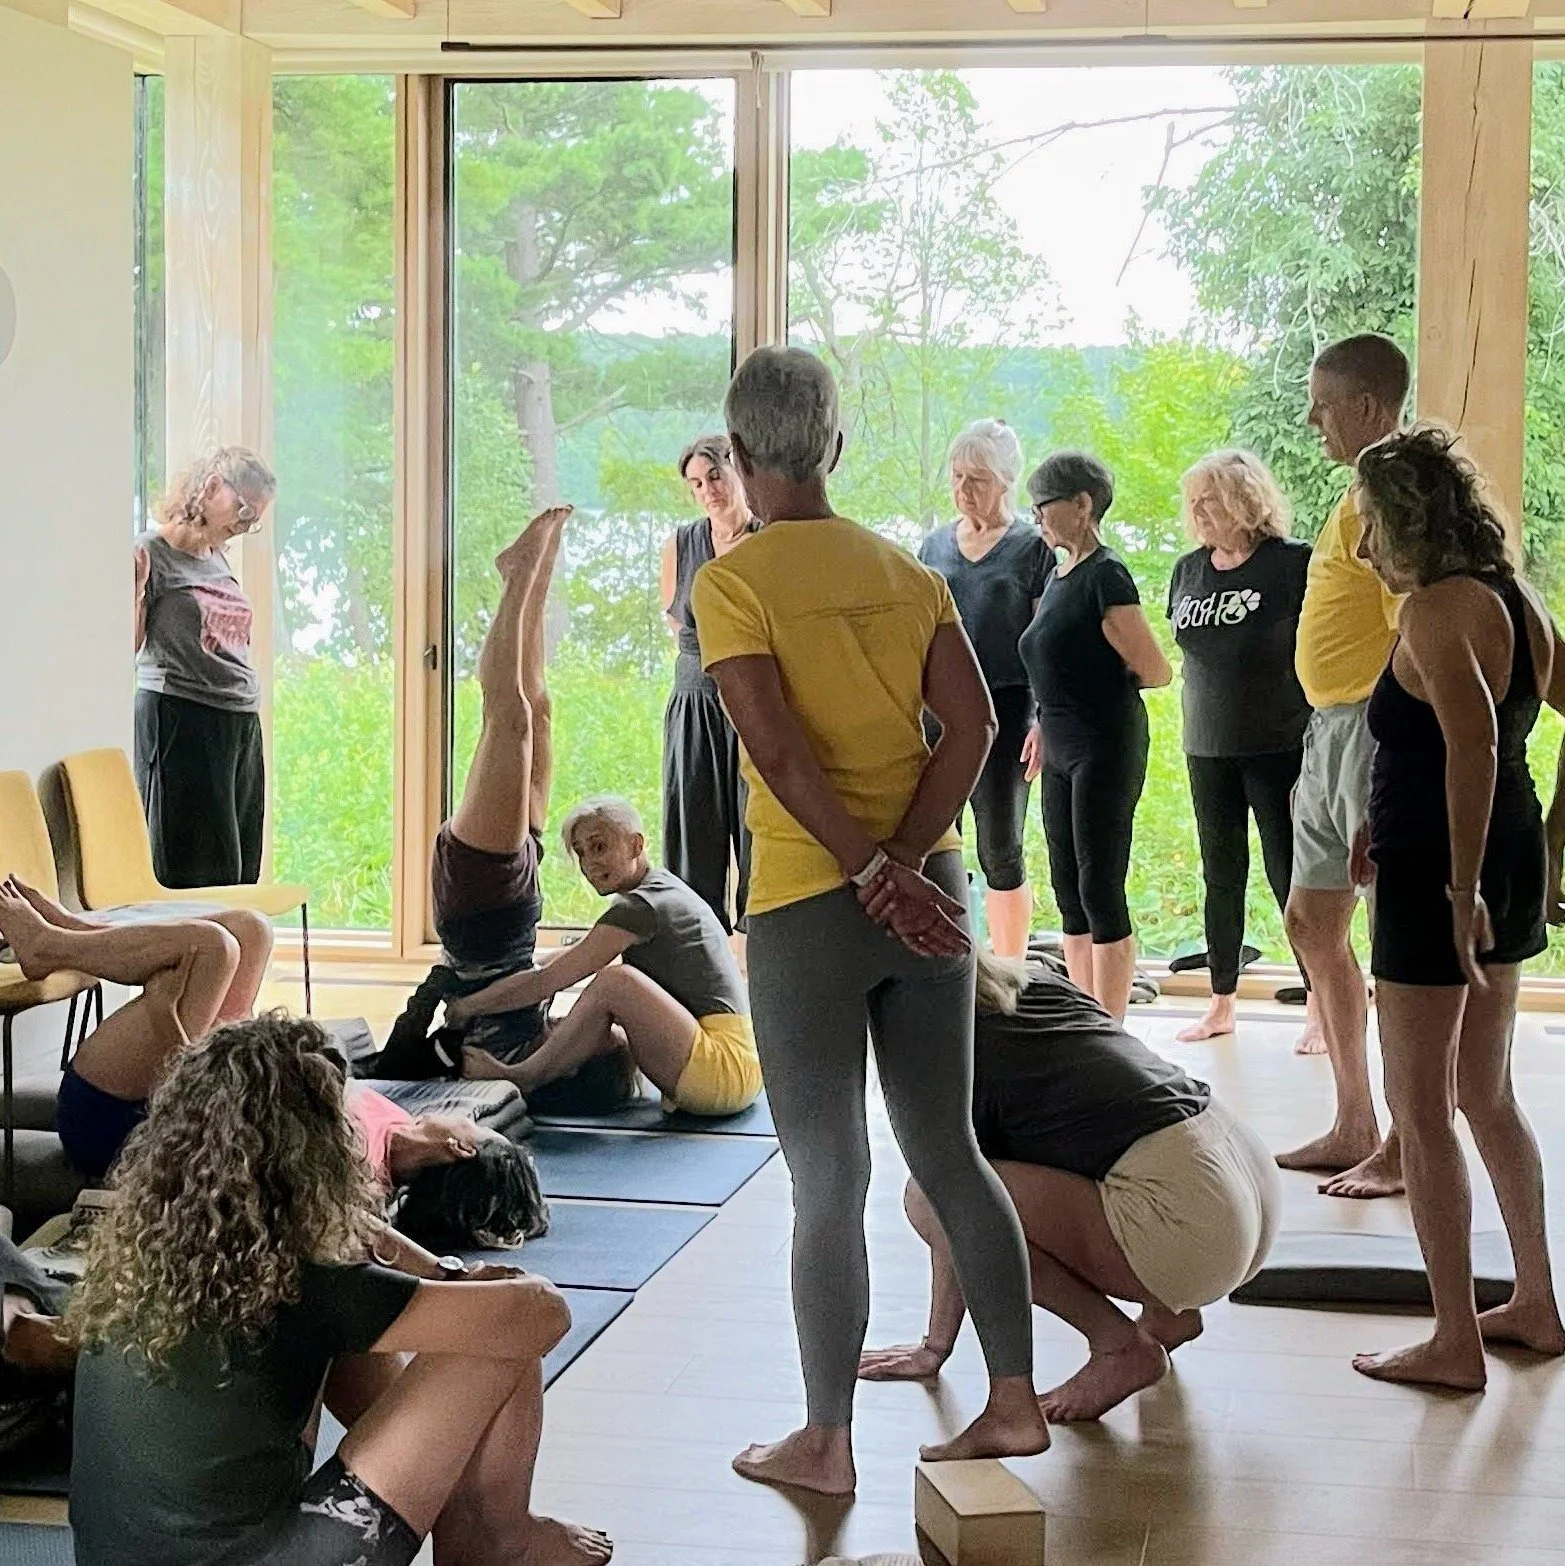
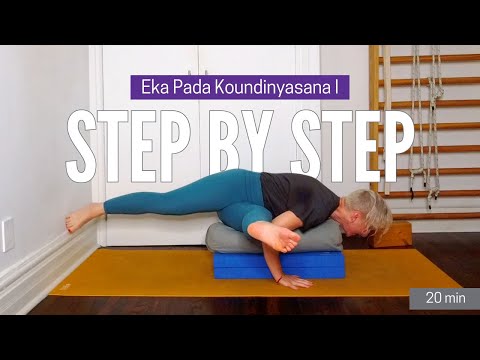
Learn Through Practice
Access video-based learning with free online classes and tutorials.
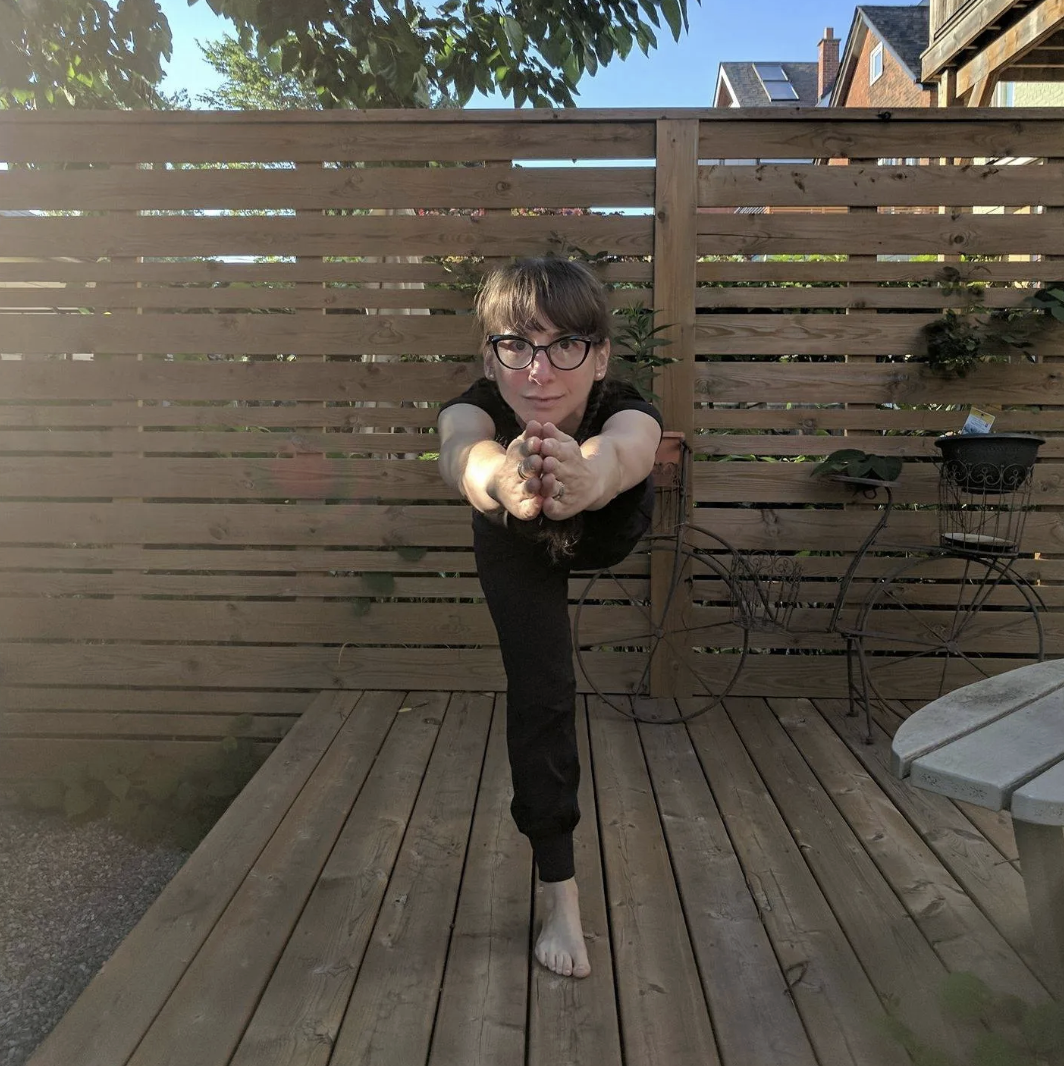
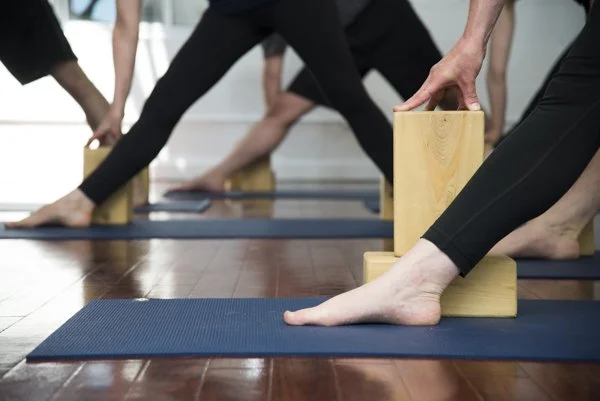
What Is Iyengar Yoga?
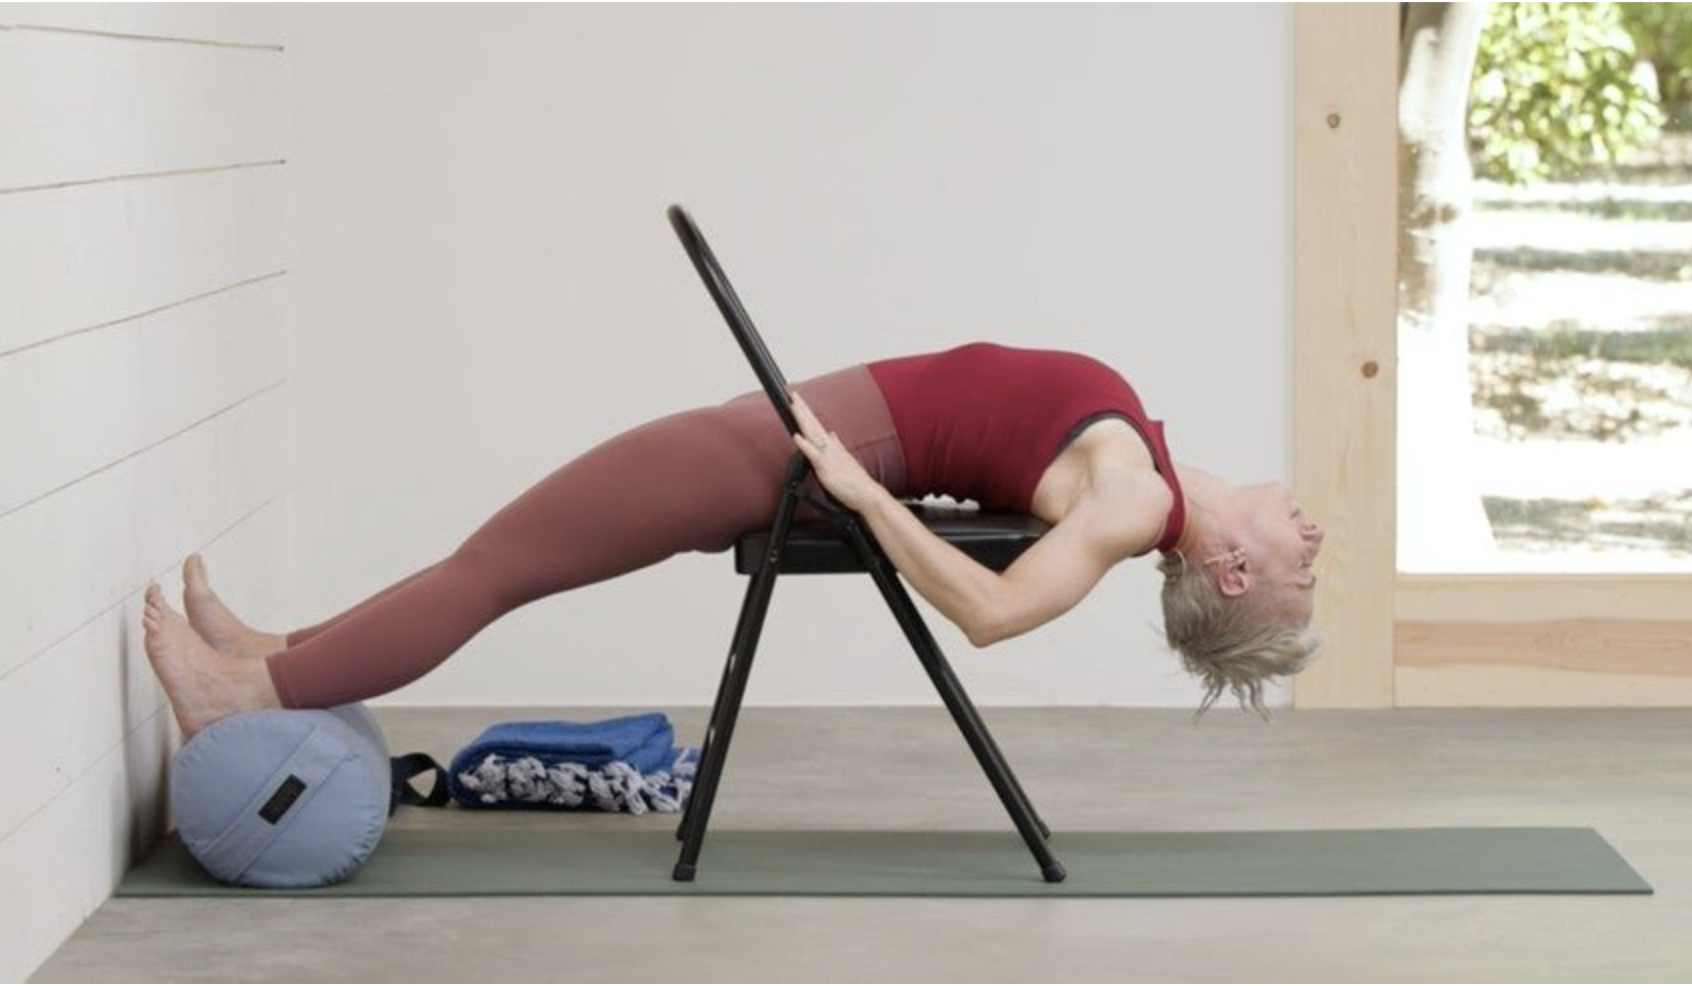
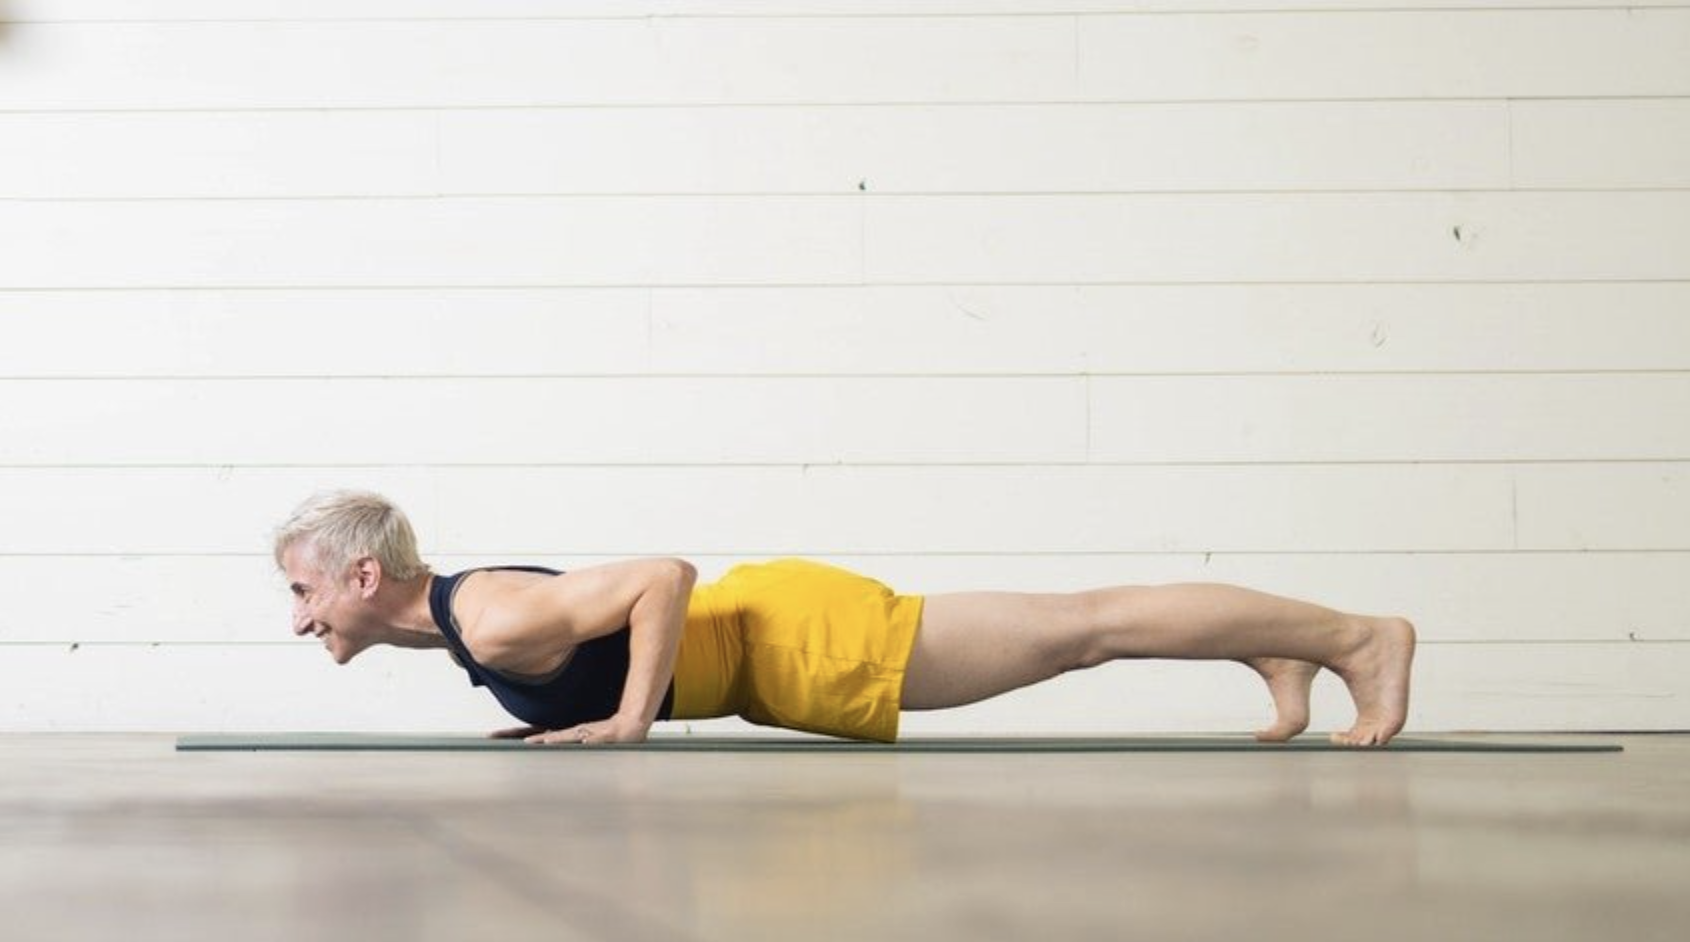
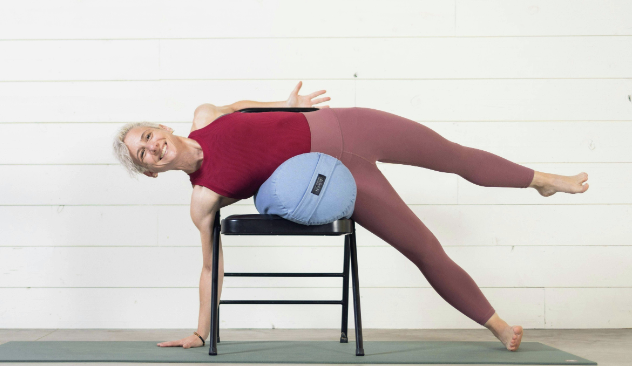
Iyengar Yoga is a methodical approach to practice that emphasizes alignment, sequencing, and the intelligent use of props.
Rather than moving quickly from pose to pose, the practice focuses on understanding how each posture works — building strength, mobility, and awareness over time.
It is accessible to beginners, adaptable for injury recovery, and precise enough to support long-term progression.
Articles & Insights
Restorative yoga isn’t always restful. This reflective piece explores why the practice can feel challenging, how it evolves over time, and why true restoration depends on understanding your body, mind, and individual needs.
In practice, nothing exists in isolation. Each action informs the next. Learning to link poses and movements isn’t just about sequence—it’s about developing continuity, sensitivity, and a more integrated understanding of the body.
In Iyengar Yoga, props aren’t used to make poses easier—they’re used to make them more intelligent. With the right support, the body can learn, refine, and experience each pose more deeply.
Practicing Iyengar Yoga online isn’t just a substitute for being in the room—it’s an opportunity to develop independence, attention, and a more personal relationship to your practice, wherever you are.
Many people come to Iyengar Yoga expecting a physical practice—and discover something much deeper. Through precision, attention, and time, beginners often find not just strength and flexibility, but a different way of understanding what yoga actually is.
Chronic back pain, arthritis, scoliosis — it’s been a journey! Then I found Iyengar Yoga. With props, precise alignment, and mindful sequencing, it didn’t just strengthen my body — it helped me move with confidence and ease. Curious to learn more?
A clear introduction to Iyengar Yoga—what makes it different, how it works, and what you can expect as a student of the method.
Join the Newsletter
Stay connected with new articles, videos, and updates from the studio.
Video Practices & Tutorials
A 45-minute Iyengar Yoga practice focused on strengthening the core through precise, controlled movements. This sequence develops both abdominal and spinal muscle strength to support stability and posture.
A 45-minute Iyengar Yoga practice designed to strengthen and tone the core by working both the abdominal muscles and the muscles that build spinal strength. The sequence uses precise, focused movements to develop control, stability, and endurance.
Continue your practice inside Po Online where we build on these foundations with structured classes, progressions, and deeper study.
About This Practice
This class focuses on developing core strength through a combination of abdominal work and spinal strength. Rather than isolating one area, the practice looks at how these muscle groups work together to stabilize the body.
The emphasis is on precision and control. By moving carefully through each pose, you begin to build strength in a way that supports posture and overall stability, rather than relying on momentum.
This is a more focused and sustained practice, designed to build endurance and awareness in the core over time.
What You’ll Practice
Urdhva Prasarita Padasana (Leg Raises) to strengthen the abdominals
Supta Padangusthasana I & II (Reclining Hand-to-Big-Toe Pose) for coordination and control
Ardha Navasana (Half Boat Pose) to build core stability
Paripurna Navasana (Full Boat Pose) to develop strength and balance
Mayurasana (Peacock Pose) to challenge full-body integration and control
When to Use This Practice
When focusing on core strength and spinal strength
To support posture and stability
As a longer, strength-based session
When building endurance in the abdominal and spinal muscles
Who This Is For
Students looking to strengthen the core
Practitioners developing stability and control
Anyone wanting to improve posture through strength
Intermediate students or those ready for a more sustained practice
Frequently Asked Questions
Below are some common questions about this practice and how to get the most out of it.
Why work both the abdominals and spinal muscles together?
These muscle groups support each other. Strengthening both helps create a more balanced and stable core that can better support the body in movement and stillness.
Is this practice suitable for beginners?
This is a longer and more demanding sequence. Beginners may need to modify or work gradually, while more experienced students can build endurance and control.
How does spinal strength affect posture?
Stronger spinal muscles help maintain alignment and reduce strain. This makes it easier to stay upright without collapsing or overworking certain areas.
What is the purpose of poses like Boat Pose in this sequence?
Boat Pose and its variations directly challenge the core, helping to build strength, control, and balance in the abdominal muscles.
Why include Mayurasana in a core practice?
Mayurasana requires strong integration through the core and upper body. It helps bring together strength, balance, and control developed earlier in the sequence.
Continue Your Practice
If you enjoyed this class, you can continue your practice across the Studio Po ecosystem:
Practice in-person at Studio Po Yoga
Explore full-length classes inside Po Online
Read reflections and insights on Stephanie’s Blog
A 25-minute Iyengar Yoga practice designed to relieve upper back stiffness by mobilizing the shoulders and creating more movement through the spine. This intermediate sequence uses props to support deeper work in backbends and inversions.
A 25-minute Iyengar Yoga practice focused on releasing upper back stiffness through backbends and inversions. Using props such as a chair, bolster, and blocks, the sequence helps mobilize the shoulders and create greater malleability along the spine.
Continue your practice inside Po Online where we build on these foundations with structured classes, progressions, and deeper study.
About This Practice
This class addresses upper back stiffness by working through supported backbends and inversions. The use of props allows the body to open more gradually, helping to reduce resistance and access deeper layers of movement in the spine.
The emphasis is on creating mobility without force. By supporting the body appropriately, the shoulders and upper back can release more effectively, while the spine becomes more responsive and adaptable.
This is an intermediate-level practice that combines structure and support to explore backbending in a more refined way.
What You’ll Practice
Supported backbends using a chair and bolster
Inversions to stimulate circulation and awareness
Mobilizing the shoulders to release upper back tension
Using props to deepen and support the work
When to Use This Practice
When experiencing upper back stiffness
As part of a morning practice to energize the body
During an afternoon reset to improve focus
When exploring backbends and inversions with support
Who This Is For
Students experiencing stiffness in the upper back and shoulders
Practitioners with some Iyengar Yoga experience
Anyone wanting to explore backbends with props
Students looking for a more structured, supported sequence
Frequently Asked Questions
Below are some common questions about this practice and how to get the most out of it.
How do props help release stiffness in the upper back?
Props support the body so that it can open gradually without strain. This allows the upper back and shoulders to release more effectively over time.
Why include inversions in a practice for the upper back?
Inversions help change the orientation of the body and stimulate circulation. They can also support opening in the shoulders and upper spine.
Is this practice suitable for beginners?
This is an intermediate-level sequence. Some familiarity with backbends and inversions is helpful before attempting the practice.
What is meant by “malleability” in the spine?
Malleability refers to the spine’s ability to move and adapt without stiffness or resistance. This practice helps develop that quality through supported movement.
When is the best time to do this practice?
This sequence can be useful in the morning to energize the body or later in the day to counteract stiffness from sitting.
Continue Your Practice
If you enjoyed this class, you can continue your practice across the Studio Po ecosystem:
Practice in-person at Studio Po Yoga
Explore full-length classes inside Po Online
Read reflections and insights on Stephanie’s Blog
A 30-minute Iyengar Yoga practice focused on engaging and strengthening the hamstrings to support the knees, hips, and lower back. This sequence explores how to activate these muscles more effectively through standing and balancing poses.
A 30-minute Iyengar Yoga practice designed to strengthen the hamstrings by learning how to engage them more directly. This work supports the knees, hips, and lower back while improving coordination and control in standing and balancing poses.
Continue your practice inside Po Online where we build on these foundations with structured classes, progressions, and deeper study.
About This Practice
This class shifts the focus from stretching the hamstrings to strengthening them. By working with specific actions that encourage the muscles to engage more clearly, you begin to build stability and support throughout the lower body.
As the hamstrings become more responsive, they help stabilize the knees and support the hips, which in turn reduces unnecessary strain on the lower back. The practice also connects this work to more advanced actions, showing how strong hamstrings contribute to movements like kicking up into a handstand!
What You’ll Practice
Tadasana (Mountain Pose) to establish alignment and engagement
Virabhadrasana III (Warrior III) to strengthen the hamstrings and improve balance
Urdhva Prasarita Eka Padasana (Standing Split) to activate and coordinate the legs
Learning how to engage the hamstrings more effectively
When to Use This Practice
When working to strengthen the hamstrings
To support knee and hip stability
As preparation for more advanced movements like the handstand
When improving control in standing and balancing poses
Who This Is For
Students wanting to strengthen rather than stretch the hamstrings
Practitioners supporting knee, hip, or lower back health
Anyone working toward inversions, like a handstand
Both beginners and experienced students refining muscle engagement
Frequently Asked Questions
Below are some common questions about this practice and how to get the most out of it.
Why focus on strengthening the hamstrings instead of stretching them?
Strengthening the hamstrings helps create stability in the legs and supports the joints. This can be more beneficial long-term than focusing only on flexibility.
How do the hamstrings support the lower back?
The hamstrings connect into the pelvis and help stabilize it. When they are working effectively, they reduce the load placed on the lower back.
Can this practice help improve balance?
Yes. Stronger hamstrings contribute to better control in standing and balancing poses, which improves overall stability.
How does this relate to Handstand?
Hamstring strength helps control the movement of the legs when kicking up. This makes the action more stable and coordinated.
Is this suitable for beginners?
Yes. The poses are accessible, and the focus on muscle engagement makes it appropriate for beginners while still offering depth for more experienced students.
Continue Your Practice
If you enjoyed this class, you can continue your practice across the Studio Po ecosystem:
Practice in-person at Studio Po Yoga
Explore full-length classes inside Po Online
Read reflections and insights on Stephanie’s Blog
A 30-minute Iyengar Yoga practice focused on relieving and preventing lower back pain by improving support through the hips, glutes, and surrounding muscles. This sequence uses simple standing poses with detailed alignment to reduce strain on the spine.
A 30-minute Iyengar Yoga practice designed to help relieve and prevent lower back pain by building strength and stability in the hips, glutes, and lower spinal muscles. The sequence focuses on how alignment in simple poses can reduce strain and create a more supported, balanced spine.
Continue your practice inside Po Online where we build on these foundations with structured classes, progressions, and deeper study.
About This Practice
This class approaches lower back care by focusing first on relieving strain in the spine, then building the support needed to prevent it from returning. The work centers on the hips and glutes, which play a key role in stabilizing the pelvis and supporting the lower back.
By refining alignment in simple standing poses, you begin to see how small adjustments can change how the lower back is loaded. This creates a more balanced distribution of effort and reduces unnecessary compression.
This is a steady, accessible practice that can be returned to regularly for both immediate relief and long-term support.
What You’ll Practice
Tadasana (Mountain Pose) to establish alignment and balance
Utthita Hasta Padangusthasana I (Extended Hand-to-Big-Toe Pose I) for hip stability
Utthita Hasta Padangusthasana II (Extended Hand-to-Big-Toe Pose II) to explore balance and control
Strengthening the hips and glutes to support the lower back
Refining alignment to reduce strain on the spine
When to Use This Practice
When experiencing lower back discomfort
To help prevent recurring back pain
To build strength in the hips and glutes
When refining alignment in standing poses
Who This Is For
Students experiencing lower back pain or discomfort
Beginners learning foundational alignment
Anyone looking for a repeatable, supportive sequence
Frequently Asked Questions
Below are some common questions about this practice and how to get the most out of it.
How do the hips and glutes help relieve lower back pain?
The hips and glutes support the pelvis, which in turn supports the spine. When these muscles are working effectively, they reduce the load placed directly on the lower back.
Can this practice help prevent lower back pain?
Yes. By improving strength and alignment, the body becomes better equipped to support the spine and reduce the likelihood of strain over time.
Why use standing poses for back care?
Standing poses help build strength and stability in the legs and hips, which are essential for supporting the lower back in everyday movement.
Is this suitable for beginners?
Yes. The poses are accessible, and the focus on alignment makes it appropriate for beginners while still offering useful detail for more experienced students.
How often should I practice this sequence?
This type of sequence can be practiced regularly, especially if you are working to relieve or prevent lower back discomfort.
Continue Your Practice
If you enjoyed this class, you can continue your practice across the Studio Po ecosystem:
Practice in-person at Studio Po Yoga
Explore full-length classes inside Po Online
Read reflections and insights on Stephanie’s Blog
A short Iyengar Yoga tutorial exploring how to practice Shoulderstand without props. This session focuses on practical options and a more flexible approach to maintaining consistency in your practice.
A short Iyengar Yoga tutorial focused on how to approach Shoulderstand without props when not in the studio. This is not a sequence, but a practical exploration of how to adapt your practice while still working within the principles of the pose.
Continue your practice inside Po Online where we build on these foundations with structured classes, progressions, and deeper study.
About This Practice
This tutorial looks at how to integrate Shoulderstand into your practice when a studio setup is not available. Rather than aiming for a perfect setup, the focus is on what can be done in real-life conditions and how to work with what you have.
You’ll explore a simplified approach to the Shoulderstand family, along with an important shift in mindset—from ideal conditions to consistent practice.
This is a practical and adaptable session designed to support continuity in your yoga practice over time.
What You’ll Practice
Understanding Shoulderstand as a family of poses
Two Shoulderstand variations that can be practiced without props
Developing consistency over ideal conditions
When to Use This Practice
When travelling or away from your usual setup
When you don’t have access to props
As a quick, practical tutorial on inversions
When building consistency in your home practice
Who This Is For
Students learning how to adapt their practice
Practitioners without access to props
Anyone working to maintain consistency in yoga
Both beginners and experienced students exploring inversions
Frequently Asked Questions
Below are some common questions about this practice and how to get the most out of it.
Can I practice Shoulderstand safely without props?
It depends on your experience and comfort with the pose. This tutorial offers simpler variations that can be practiced without props, while still respecting the principles of the pose.
What does it mean that Shoulderstand is a “family” of poses?
Shoulderstand includes a range of related variations that share similar actions and benefits. Understanding this allows you to choose options that suit your current conditions.
Is this suitable for beginners?
Yes, especially as an introduction to simpler inversion options. Beginners can use this as a starting point while building familiarity with the pose.
What if my setup isn’t ideal?
This practice emphasizes working with what is available. While ideal setups are helpful, consistency in practice is more important than waiting for perfect conditions.
Why practice without props at all?
Practicing without props can help develop adaptability and independence. It also allows you to maintain your practice in a wider range of situations.
Continue Your Practice
If you enjoyed this class, you can continue your practice across the Studio Po ecosystem:
Practice in-person at Studio Po Yoga
Explore full-length classes inside Po Online
Read reflections and insights on Stephanie’s Blog
A 20-minute Iyengar Yoga practice exploring Virabhadrasana I and III through different entries and actions. This sequence builds strength, stability, and balance while developing a clearer understanding of how these poses function.
A 20-minute Iyengar Yoga practice focused on building strength and stability through Virabhadrasana I and Virabhadrasana III. By exploring different ways of entering the poses, the sequence highlights how small changes can shift balance, effort, and awareness.
Continue your practice inside Po Online where we build on these foundations with structured classes, progressions, and deeper study.
About This Practice
This class focuses on two foundational standing poses—Virabhadrasana I and Virabhadrasana III—and explores how different entries into the poses affect the overall experience. By varying how you arrive in the pose, you begin to notice changes in balance, strength, and coordination.
This creates a more responsive and aware practice, where the way you move into the pose becomes just as important as the pose itself.
This is a dynamic and exploratory sequence that builds both physical strength and sensitivity in the body.
What You’ll Practice
Virabhadrasana I (Warrior I) through different entry points
Virabhadrasana III (Warrior III) with a focus on balance and control
Exploring how transitions affect stability and effort
Coordinating strength through the legs and core
When to Use This Practice
When working on balance and coordination
To build strength in standing poses
As a focused exploration of Warrior poses
When you want a dynamic, no-props sequence
Who This Is For
Beginners learning foundational standing poses
Students developing balance and stability
Practitioners interested in refining transitions
Experienced students exploring variation within familiar poses
Frequently Asked Questions
Below are some common questions about this practice and how to get the most out of it.
Why explore different ways of entering a pose?
Changing how you enter a pose can reveal how balance, strength, and coordination shift. This helps build a deeper understanding of the pose rather than relying on a single approach.
What is the benefit of practicing Virabhadrasana I and III together?
These poses complement each other by working different aspects of strength and balance. Together, they help develop stability through the legs and control through the whole body.
Is this practice suitable for beginners?
Yes. The poses are foundational, and the variations offer opportunities to explore at different levels while building confidence and awareness.
Do I need props for this sequence?
No. This is a no-props practice, allowing you to focus on how your body organizes itself through movement and balance.
How do transitions affect balance in these poses?
The way you move into a pose can change how stable it feels. Practicing different entries helps you understand how to control movement and maintain balance more effectively.
Continue Your Practice
If you enjoyed this class, you can continue your practice across the Studio Po ecosystem:
Practice in-person at Studio Po Yoga
Explore full-length classes inside Po Online
Read reflections and insights on Stephanie’s Blog
A 20-minute Iyengar Yoga practice using standing poses to release tension in the neck, shoulders, and upper back. This sequence explores how small modifications can shift the work into the upper body while maintaining strength and stability through the legs.
A 20-minute Iyengar Yoga practice focused on relieving tension in the neck, shoulders, and upper back using standing poses. By making small adjustments to familiar shapes, the sequence shows how to create space in the upper body while staying grounded and stable through the legs.
Continue your practice inside Po Online where we build on these foundations with structured classes, progressions, and deeper study.
About This Practice
This class revisits a small number of standing poses and shifts the emphasis to the upper body. Rather than focusing on the legs or hips, the work is directed into the neck, shoulders, and upper back through specific adjustments in the poses.
These modifications help release tightness and create space in the upper spine without losing stability. The legs remain active and supportive, allowing the upper body to soften and open more effectively.
This is a simple but focused practice that demonstrates how standing poses can be used beyond their usual application.
What You’ll Practice
Modifying pose setup to release the neck and shoulders
Creating space in the upper back and spine
Maintaining strength in the legs while freeing the upper body
When to Use This Practice
When experiencing tension in the neck or shoulders
After long periods of sitting or desk work
As a short upper body reset
When you want to use standing poses in a more targeted way
Who This Is For
Students experiencing neck, shoulder, or upper back stiffness
Practitioners wanting to adapt standing poses for upper body work
Anyone looking for a simple, effective release practice
Both beginners and experienced students
Frequently Asked Questions
How can standing poses help relieve tension in the shoulders?
Standing poses provide a stable base through the legs, allowing the upper body to release more effectively. With the right adjustments, the shoulders can soften while the body remains supported.
Why focus on the upper body in standing poses?
Shifting the focus changes how the pose is experienced. Instead of working primarily in the legs or hips, the pose becomes a way to address tension in the neck, shoulders, and upper back.
Do I need props for this practice?
No. This sequence works with simple modifications to the poses, allowing you to access the work without additional support.
Is this suitable for beginners?
Yes. The poses are familiar and the adjustments are accessible, making it appropriate for beginners while still offering useful detail for more experienced students.
How does this help with posture?
By releasing tension in the shoulders and upper back, the body can organize more naturally. This can help reduce rounding and improve overall alignment.
Continue Your Practice
If you enjoyed this class, you can continue your practice across the Studio Po ecosystem:
Practice in-person at Studio Po Yoga
Explore full-length classes inside Po Online
Read reflections and insights on Stephanie’s Blog
A progressive Iyengar Yoga practice using a chair, block, and blanket to explore supported backbends. Learn how to open the chest, lengthen the lumbar spine, and deepen extension with stability and awareness.
This class focuses on supported backbends using a chair, a key approach in the Iyengar Yoga method to help create space in the spine while reducing compression in the lower back. The emphasis is on clarity, alignment, and understanding how to extend the spine without strain.
It’s a steady, accessible sequence that allows you to stay in the poses longer and observe the actions carefully. Whether you’re new to backbends or refining your practice, this approach offers a sustainable way to work, even if
With the use of a chair, the practice becomes more supportive and precise—making it especially useful for students who want to build confidence in backbending.
What You’ll Practice
Tadasana (Mountain Pose)
Supported Backbend over Chair
Urdhva Mukha Svanasana (Upward Facing Dog – supported variation)
Setu Bandha Sarvangasana (Bridge Pose – supported variation)
Gentle counterposes and rest
When to Use This Practice
When exploring backbends with more support
If you experience lower back sensitivity
As a focused mobility session
When you want a steady, supported practice
Who This Is For
Beginners learning how to approach backbends safely
Students with lower back sensitivity
Anyone looking to use props to improve alignment
Experienced practitioners refining foundational actions
Frequently Asked Questions
Are supported backbends better for the lower back?
Supported backbends can help reduce strain in the lower back by distributing the work more evenly through the spine. Using a chair allows you to create space and extension without forcing depth.
Do I need a yoga chair for this class?
A yoga chair is helpful, but not required. A stable household chair can work well, as long as it provides reliable support and is appropriate for your height.
Is this backbend practice suitable for beginners?
Maybe. The use of a chair makes backbends more accessible and easier to understand. Students with some yoga experience but new to backbending can explore the actions safely while building confidence and awareness, That said, if you are brand new to yoga, this is not the practice I’d suggest you start with. Instead, consider a practice of standing poses.
Can I do this practice if I have lower back sensitivity?
For some people, yes, for others, no. It’s really quite a personal decision. Please ease into the postions, use adequate support, and avoid pushing into discomfort. If you are unsure, connect with a teacher and ask for help.
When should I practice supported backbends like this?
This practice works well when you want to focus on spinal mobility and also explore the benefits of staying in these positions for longer durations.
What style of yoga is this?
This class is taught in the Iyengar Yoga method, which emphasizes precision, alignment, and the intelligent use of props to support learning.
Continue Your Practice
If you enjoyed this class, you can continue your practice across the Studio Po ecosystem:
Practice in-person at Po Toronto
Explore full-length classes inside Po Online
Read reflections and insights onStephanie’s Blog
A 30-minute Iyengar Yoga practice exploring how to stabilize the hips through the complementary actions of broadening the front pelvis and compacting at the hips. These actions are applied across standing and balancing poses to create greater steadiness and ease.
A 30-minute Iyengar Yoga practice focused on strengthening and stabilizing the hips through the coordinated actions of broadening the front pelvis and compacting at the hips. These complementary actions help create stability and ease in standing and balancing poses.
Continue your practice inside Po Online, where we build on these foundations with structured classes, progressions, and deeper study.
About This Practice
This class looks at how the hips function in standing and balancing poses by working with two key actions: broadening across the front pelvis and compacting at the outer hips. When these actions are understood and applied together, they create a more stable and integrated base.
Rather than focusing on effort alone, the emphasis is on coordination—how different parts of the body work together to support balance and alignment. These actions are explored across several foundational poses to clarify how the hips support the entire posture.
What You’ll Practice
Tadasana (Mountain Pose)
Ardha Uttanasana (Half Forward Fold)
Utthita Trikonasana (Extended Triangle Pose)
Ardha Chandrasana (Half Moon Pose)
Vasisthasana (Side Plank Pose)
Exploring how to broaden the front pelvis and compact at the hips
Applying these actions in standing and balancing poses
When to Use This Practice
When working on hip stability in standing poses
To improve balance and coordination
As a focused session on hip mechanics
When refining alignment in foundational poses
Who This Is For
Students working to improve stability in standing poses
Practitioners exploring how the hips support balance
Anyone wanting to better understand hip actions
Experienced students refining coordination and alignment
Frequently Asked Questions
Below are some common questions about this practice and how to get the most out of it.
What does it mean to broaden the front pelvis?
Broadening the front pelvis refers to creating space across the front of the hips without gripping or tightening. This helps prevent collapse and allows for more even distribution of effort.
What does “compacting at the hips” mean in yoga?
Compacting at the hips involves drawing the outer hips inward to create stability. This action supports balance and helps maintain integrity in standing and balancing poses.
Why are these two actions used together?
These actions are complementary. Broadening creates space, while compacting provides support. Together, they help stabilize the pelvis and improve coordination in the pose.
How does this help with balance poses like Half Moon or Side Plank?
When the hips are stable, the rest of the body can organize more effectively. These actions help prevent wobbling or collapsing, making balancing poses feel more steady.
Is this suitable for beginners?
Yes. While the concepts are detailed, the poses are foundational. Beginners can start to build awareness, while more experienced students can refine their understanding.
What style of yoga is this?
This class is taught in the Iyengar Yoga method, which emphasizes precision, alignment, and understanding how actions in the body create stability and ease.
Continue Your Practice
If you enjoyed this class, you can continue your practice across the Studio Po ecosystem:
Practice in-person at Po Toronto
Explore full-length classes inside Po Online
Read reflections and insights on Stephanie’s Blog
A short Iyengar Yoga sequence designed to both mobilize and stabilize the hips through simple, repeated shapes. This dynamic approach helps build strength, improve mobility, and develop balance without the use of props.
This class explores how a small number of poses, layered dynamically, can have a significant impact on the hips. The focus is not on complexity, but on how movement and repetition help to both mobilize and stabilize the joints.
By moving in and out of familiar shapes, you begin to understand how the hips respond to both load and release. This creates a balance between strength and mobility, while also developing coordination and steadiness through the legs.
No props are used in this practice, allowing you to work directly with your body and the actions in each pose.
Continue your practice inside Po Online: where we build on these foundations with structured classes, progressions, and deeper study.
What You’ll Practice
Simple standing shapes to mobilize the hips
Coordinating movement to build stability in the hip joints
Working through hip and groin mobility
Developing balance through dynamic transitions
Strengthening the legs to support hip stability
When to Use This Practice
When you want a short, effective hip-focused session
To improve mobility in the hips and groins
As a dynamic practice to build strength and coordination
When you want to move without props
Who This Is For
Students looking to improve hip mobility
Anyone wanting a short, focused sequence
Experienced students refining coordination through repetition
Frequently Asked Questions
Below are some common questions about this practice and how to get the most out of it.
How does repeating poses help improve hip mobility?
Repetition allows the body to gradually release tension while building familiarity with the movement. Over time, this helps increase mobility while maintaining control and stability.
Can a short sequence still be effective for the hips?
Yes. When the sequence is focused and repeated with attention, even a short practice can create noticeable changes in both mobility and strength.
Is this practice suitable for beginners?
Yes. The sequence uses simple shapes, making it accessible, while the repetition allows beginners to build understanding and confidence over time.
Do I need props for this practice?
No. This is a no-props sequence, designed so you can practice anywhere using just your body and the floor.
Continue Your Practice
If you enjoyed this class, you can continue your practice across the Studio Po ecosystem:
Practice in-person at Studio Po Yoga
Explore full-length classes inside Po Online
Read reflections and insights on Stephanie’s Blog
An Iyengar Yoga sequence exploring how to approach backbends by creating a smooth, supported arc through the spine. This practice focuses on strength, stability, and coordinated extension across a small group of exhilarating poses.
An Iyengar Yoga sequence focused on building strength and understanding in backbends by working toward a clear, supported arc through the spine. The practice emphasizes how to extend the spine without force by coordinating effort across the legs, back, and core.
Continue your practice inside Po Online: where we build on these foundations with structured classes, progressions, and deeper study.
About This Practice
This class explores backbending through a small group of foundational poses, each offering a different way to understand spinal extension.
By working progressively, you begin to see how strength in the legs, arms, and back supports the action of the spine. The inclusion of side variations adds another layer, helping to refine balance and stability so the work does not collapse into the lower back.
This is a more detailed practice, designed to help you understand how to create backbends that feel supported, integrated, and sustainable over time.
What You’ll Practice
Salabhasana (Locust Pose) to build strength and support spinal extension
Dhanurasana (Bow Pose) to coordinate strength and flexibility
Parsva (side) variations to refine balance and stability
Creating a smooth, even arc through the spine
Coordinating effort across the legs, core, and back body
When to Use This Practice
When working to improve backbend technique
To build strength in the back body and legs
As a focused session on spinal extension
When refining how to distribute effort in backbends
Who This Is For
Students with some Iyengar Yoga experience
Practitioners looking to deepen their understanding of backbends
Anyone working to reduce strain in spinal extension
Frequently Asked Questions
What does it mean to create a smooth arc in backbends?
A smooth arc refers to distributing the extension evenly along the spine, rather than concentrating the movement in one area. This helps prevent compression, especially in the lower back.
Why do backbends sometimes feel strained in the lower back?
Strain often occurs when the spine is not extending evenly or when other parts of the body are not contributing enough. Without support from the legs and back body, the lower back tends to take more of the load.
How do poses like locust and bow help with backbends?
These poses build strength in the back body and help you understand how to lift and extend the spine. They prepare the body for deeper backbends by developing support and coordination.
What is the purpose of side variations in this sequence?
Side variations help identify imbalances and improve stability. They encourage more even work through both sides of the body, which supports a more balanced backbend.
Is this suitable for beginners?
This practice is better suited to students with some experience, as it focuses on more detailed actions and coordination within the poses.
Continue Your Practice
If you enjoyed this class, you can continue your practice across the Studio Po ecosystem:
Practice in-person at Studio Po Yoga
Explore full-length classes inside Po Online
Read reflections and insights on Stephanie’s Blog
A 20-minute Iyengar Yoga practice focused on building a stable foundation for backbends by learning how the legs and glutes support the spine. This sequence uses standing poses to develop strength and awareness for safer, more integrated back extensions.
A 20-minute Iyengar Yoga practice exploring how to build a stable foundation for backbends by activating the legs and glute muscles. The focus is on how engagement at the pelvis supports the spine and helps create a smooth, integrated arc in back extensions.
Continue your practice inside Po Online where we build on these foundations with structured classes, progressions, and deeper study.
About This Practice
This class approaches backbends through standing poses, with a focus on how the legs and glutes support spinal extension. By working from the ground up, you begin to understand how the pelvis acts as the base of the spine and why proper engagement is essential.
Rather than forcing depth, the emphasis is on creating a balanced arc through the spine by coordinating effort across the lower body. This helps prevent strain and builds a more stable, supported approach to backbending.
This is a foundational practice that highlights the role of the legs in backbends and clarifies how to engage without overworking or collapsing.
What You’ll Practice
Utthita Trikonasana (Extended Triangle Pose) to establish foundational alignment
Standing poses to activate the legs and glutes
Learning how glute engagement supports the pelvis and spine
Coordinating effort to create a smooth spinal arc
Building strength in the legs and back body to support backbends
When to Use This Practice
When learning the foundations of backbending
To improve strength and support in the lower body
As preparation for deeper backbends
Who This Is For
Students returning to fundamentals with more awareness
Practitioners working to reduce strain in backbends
Anyone wanting to understand how the lower body supports the spine
Frequently Asked Questions
What role do the glutes play in backbends?
The glutes help stabilize the pelvis, which supports the base of the spine. When they engage appropriately, they help create a more even and supported spinal extension.
Why is leg engagement important in backbends?
The legs provide the foundation for the pose. Without enough engagement, the spine may take on too much of the work, leading to instability or strain.
What does it mean to create an integrated arc in the spine?
An integrated arc means the extension is distributed evenly along the spine, rather than concentrated in one area. This helps create a smoother and more supported backbend.
Is this practice suitable for beginners?
Yes. This class focuses on foundational actions and is appropriate for beginners, while still offering useful detail for more experienced students.
How does this help prevent strain in backbends?
By building strength and awareness in the legs and pelvis, the spine is better supported. This reduces the likelihood of overloading the lower back.
What style of yoga is this?
This class is taught in the Iyengar Yoga method, which emphasizes precision, alignment, and understanding how different parts of the body work together to support the spine.
Continue Your Practice
If you enjoyed this class, you can continue your practice across the Studio Po ecosystem:
Practice in-person at Studio Po Yoga
Explore full-length classes inside Po Online
Read reflections and insights on Stephanie’s Blog
A 25-minute yoga practice designed to gently awaken your body and mind using foundational poses taught in the Iyengar Yoga method. No props required—just simple, effective movement you can do anywhere.
A 25-minute yoga practice designed to gently awaken your body and mind using foundational Iyengar-inspired poses. No props required—just simple, effective movement you can do anywhere.
Continue your practice inside Po Online, where we build on these foundations with structured classes, progressions, and deeper study.
About This Practice
This class is built around foundational yoga poses that form the backbone of a strong and sustainable practice. Taught in the Iyengar Yoga method, the focus is on clarity, alignment, and awareness—helping you understand not just what to do, but how and why.
It’s a short, accessible sequence you can return to again and again. Whether you’re just starting out or have years of experience, these poses continue to offer new insight and benefit over time.
With no props required, this practice can be done anywhere—making it ideal for building consistency in your daily routine.
What You’ll Practice
Tadasana (Mountain Pose)
Urdhva Baddhanguyliasana (Upward stretch with interlaced fingers)
Parsva Baddhanguyliasana
Urdhva Hastasana (Upward Salute)
Utkatasana (Chair Pose)
Gomukhasana arms (Shoulder opening)
Uttanasana (Forward Fold)
Savasana (Final Rest)
When to Use This Practice
Morning routine to wake up the body and mind
Midday reset to restore energy and focus
Short daily practice to build consistency
Gentle but effective entry point into yoga
Who This Is For
Beginners learning foundational yoga poses
Students returning after time away from practice
Anyone looking for a short, accessible routine
Experienced practitioners refining fundamentals
Frequently Asked Questions
Below are some common questions about this practice and how to get the most out of it.
What is a good 25-minute yoga routine for beginners?
A good 25-minute yoga routine focuses on foundational poses that build strength, flexibility, and awareness. This sequence uses simple, repeatable movements that help establish a strong base for long-term practice.
Can I do this yoga class without props?
Yes—this is a no-props yoga class. The entire sequence is designed so you can practice anywhere without needing equipment.
Is this suitable for complete beginners?
Absolutely. The poses are fundamental and taught with clear alignment cues, making the class accessible while still offering depth for more experienced practitioners.
When should I practice this sequence?
This practice works well in the morning to energize your body, midday to reset your focus, or anytime you want a short, mindful movement session.
What style of yoga is this?
This class is taught in the Iyengar Yoga method, which emphasizes precision, alignment, and awareness in each pose.
Continue Your Practice
If you enjoyed this class, you can continue your practice across the Studio Po ecosystem:
Practice in-person at Po Toronto
Explore full-length classes inside Po Online
Read reflections and insights on Stephanie’s Blog
A 20-minute Iyengar Yoga practice exploring simple, precise movements to open, strengthen, and release the shoulders. This no-props sequence works progressively to improve mobility, posture, and awareness in the upper body.
A 20-minute Iyengar Yoga practice focused on improving shoulder mobility and strength. The sequence works progressively to open the shoulders, release tension, and build stability without the use of props.
Continue your practice inside Po Online where we build on these foundations with structured classes, progressions, and deeper study.
About This Practice
Rather than relying on props, the practice works directly with the body to build awareness and control. Over time, these simple actions help create more space in the shoulders and support better posture through the upper back and neck.
What You’ll Practice
Simple shoulder movements to improve mobility
Strengthening actions to support the shoulder joints
Releasing tension in the neck and upper back
Coordinating movement and awareness in the shoulders
Building stability without the use of props
When to Use This Practice
When experiencing stiffness in the shoulders or neck
After long periods of sitting or desk work
As a short reset for the upper body
When you want a no-props practice you can do anywhere
Who This Is For
Those experiencing shoulder or neck tension
Anyone wanting a short, focused upper body practice
All levels, including beginners
Frequently Asked Questions
Below are some common questions about this practice and how to get the most out of it.
What makes simple shoulder movements effective?
When done with attention and repetition, even small movements can reach deeper layers of the body. This helps improve mobility and release tension over time.
Can this help with tension from desk work?
Yes. This type of practice targets areas that often become tight from prolonged sitting, helping to release the neck and shoulders while improving posture.
Do I need props for this sequence?
No. This is a no-props practice, designed so you can work directly with your body and practice anywhere.
Is this suitable for beginners?
Yes. The movements are simple and accessible, making the practice appropriate for beginners while still offering depth for more experienced students.
How does this improve posture?
By creating more mobility in the shoulders and awareness in the upper back, the body can organize more naturally, reducing the tendency to round or collapse forward.
Continue Your Practice
If you enjoyed this class, you can continue your practice across the Studio Po ecosystem:
Practice in-person at Studio Po Yoga
Explore full-length classes inside Po Online
Read reflections and insights on Stephanie’s Blog
Take the Next Step
Practice in Toronto
Join in-person classes at the Toronto studio.
Practice Online
Access structured classes and programs from anywhere.
A 45-minute Iyengar Yoga practice exploring the relationship between asana and breath. This sequence highlights how breath can act as a bridge, creating a more integrated and continuous experience between movement and stillness.
A 45-minute Iyengar Yoga practice focused on linking asana and breath, using the breath as a bridge toward pranayama. Through guided exploration within the poses, the practice offers an accessible way to experience how these two aspects of yoga connect and overlap.
Continue your practice inside Po Online where we build on these foundations with structured classes, progressions, and deeper study.
About This Practice
This class explores the relationship between asana and pranayama by focusing on the breath within the poses. Rather than treating them as separate practices, the sequence highlights how breath can inform and shape the experience of each movement.
The emphasis is on noticing how the breath moves, how it responds to different actions, and how it can be used more intentionally. This creates a more continuous and connected practice, where the transition from movement to stillness becomes less defined.
For students who find pranayama difficult to access directly, this approach offers a more engaging and gradual entry point.
What You’ll Practice
Observing the breath within asana
Coordinating movement with inhalation and exhalation
Exploring how breath influences stability and effort
Using asana as a gateway into pranayama
Developing awareness of transitions between movement and stillness
When to Use This Practice
When exploring the connection between movement and breath
As a transition toward pranayama
When looking to deepen awareness in asana
As a slower, more attentive practice
Who This Is For
Students curious about pranayama
Practitioners wanting to deepen breath awareness
Anyone who finds traditional pranayama difficult to access
Experienced students refining internal awareness
Frequently Asked Questions
Below are some common questions about this practice and how to get the most out of it.
How does breath act as a bridge between asana and pranayama?
The breath is present in both practices. By paying attention to it during asana, you begin to carry that awareness into stillness, making the transition into pranayama more natural.
Do I need experience with pranayama to do this practice?
No. This practice is designed as an entry point, using movement to make breath awareness more accessible.
Why is pranayama sometimes difficult to engage with?
Pranayama requires stillness and sustained attention, which can feel unfamiliar or challenging. Working with the breath in asana can make it easier to approach.
What should I focus on during this practice?
Focus on how the breath moves and how it responds to different actions. The goal is observation rather than control.
Is this suitable for beginners?
Yes. The practice offers an accessible introduction to breath awareness while still providing depth for more experienced students.
Continue Your Practice
If you enjoyed this class, you can continue your practice across the Studio Po ecosystem:
Practice in-person at Studio Po Yoga
Explore full-length classes inside Po Online
Read reflections and insights on Stephanie’s Blog